Bambu Lab A1 Mini
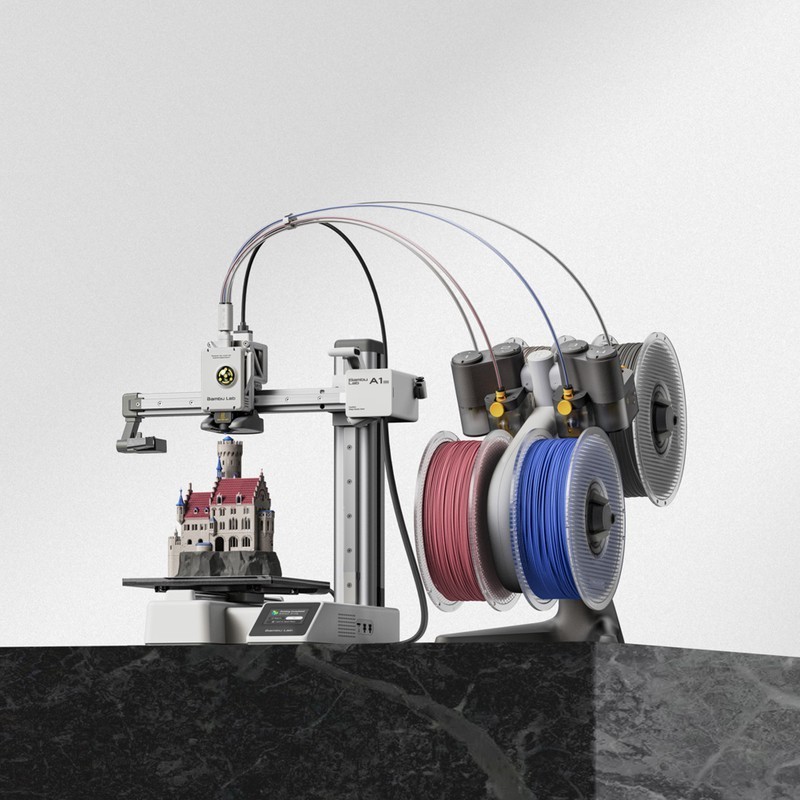
The Bambu Lab A1 Mini is a compact bed-slinger 3D printer with a 180x180x180mm build volume, 500mm/s print speed, 10000mm/s² acceleration, and fully automatic calibration. At $199, it is the definitive entry-level printer — the exit ramp for anyone tired of tinkering with DIY boards who just wants parts that print correctly every time.
The best first 3D printer — skip if you need a build volume larger than 180mm or high-temp material support.
Where to Buy
Pros
- 500mm/s print speed at $199 — fastest printer in its price class by a wide margin
- Fully pre-assembled and auto-calibrated — prints quality parts within 15 minutes of unboxing
- 49dB noise level — whisper-quiet for bedrooms, dorms, and shared spaces
- AMS Lite compatible for 4-color multi-material printing at ~$80 add-on
- Bambu Studio slicer and Handy app provide the same polished workflow as the $699 P1S
Cons
- 180mm³ build volume — too small for helmets, large enclosures, or full-size cosplay parts
- Open frame with no enclosure — ABS and high-temp materials are impractical
- 10000mm/s² acceleration vs 20000mm/s² on the P1S — slightly slower on short-segment prints
- No quick-change nozzle — swapping nozzles requires disassembly unlike the A1
The Exit Ramp From DIY Frustration
The A1 Mini exists for a specific person: someone who has read about 3D printing, maybe struggled with an Ender 3 or a kit printer, and wants something that just works. At $199, it removes every excuse not to try 3D printing, and it removes every source of frustration that makes people quit the hobby.
The printer arrives fully pre-assembled. Unbox, remove shipping brackets, load filament, and print. Bambu's auto-calibration handles vibration compensation, flow rate calibration, and first-layer inspection automatically. There is no manual bed leveling, no Z-offset adjustment, no PID tuning. The machine calibrates itself every time you start a print.
At 500mm/s with 10000mm/s² acceleration, the A1 Mini reviewers report Benchy prints in under 20 minutes. Two years ago, that speed was reserved for $1000+ machines. The price-to-performance ratio has made every sub-$200 competitor obsolete overnight.
Small Volume, Big Capability
The 180x180x180mm build volume is the A1 Mini's primary constraint and its most common objection. In practice, 180mm covers far more use cases than people expect. Phone cases, desk organizers, Arduino enclosures, drone parts, cable management clips, figurines, keycaps — all fit comfortably. You hit the limit on full-size helmets, large vases, and armor panels.
For ESP32 and Arduino project enclosures, the A1 Mini is actually the ideal printer. Most PCB enclosures are under 120mm in every dimension. The fast print speed means you can iterate a case design in 20 minutes instead of 2 hours. This is why the A1 Mini is the recommended companion printer in our DIY board reviews — when the project needs a physical housing, this is the tool.
The textured PEI build plate handles PLA and PETG adhesion without glue or tape. Parts pop off when the plate cools. It is the small quality-of-life details like this that separate the A1 Mini from budget printers that technically hit the same specs on paper but fall apart in daily use.
Ecosystem and Upgrade Path
The A1 Mini runs the same Bambu Studio slicer, Bambu Handy app, and cloud infrastructure as the $699 P1S. Your print profiles, model library, and workflow transfer directly if you upgrade later. This shared ecosystem is Bambu's strategic moat — once you learn the workflow on the Mini, switching to a Prusa or Creality means relearning everything.
The AMS Lite adds 4-color printing for roughly $80, bringing the total system cost to $280 — still less than most single-color competitors. Multi-color PLA prints are where the A1 Mini becomes genuinely fun rather than merely useful. Two-tone logos, color-coded organizers, and painted-look figurines without actual painting.
The upgrade path is clear: A1 Mini ($199) for learning and small prints, A1 ($299) for larger volume and quick-change nozzles, P1S ($699) for enclosed multi-material. Each step up adds capability without changing the workflow. This is consumer electronics product strategy applied to 3D printing, and it works.
Noise, Heat, and Living Space Compatibility
At 49dB measured during printing, the A1 Mini is quieter than a household refrigerator. This spec matters more than it appears on paper — it determines whether the printer lives on your desk or gets banished to a garage. Previous budget printers like the Ender 3 V2 ran at 55-65dB during fast moves, producing a persistent whine that made bedroom or shared-room use impractical. The A1 Mini can run overnight in the same room where someone is sleeping.
The open-frame design also means heat dissipation is a non-issue for PLA. The hotend reaches 300°C and the bed reaches 80°C, but ambient temperature around the printer stays near room temperature. This is actually ideal for PLA, which prints best without chamber heating. There is no risk of heat damage to a desk surface, and the printer does not warm the room. For dorm rooms, apartments, and home offices where the printer shares space with electronics and furniture, the A1 Mini's thermal profile is benign. Combined with the compact 347x315x365mm footprint, it occupies less desk space than a laser printer while producing genuine three-dimensional objects.
A1 Mini as the Gateway Printer
The A1 Mini is the most recommended first 3D printer in every major community — r/3Dprinting, r/BambuLab, and dozens of YouTube channels all converge on the same advice: start here. The reason is not just the $199 price, though that helps. It is the elimination of every friction point that historically made people abandon the hobby within 60 days.
Previous generation entry-level printers like the Ender 3 required 2-4 hours of assembly, manual bed leveling every few prints, slicer profile tuning, and firmware flashing for basic features. The A1 Mini ships fully assembled with auto-calibration that handles vibration compensation, flow rate adjustment, and first-layer inspection without user input. This is the printer that made the phrase "just works" actually mean something in 3D printing. It is the printer that tinkerers buy for their spouses, their parents, and their kids — because it never requires a support call.
What the A1 Mini teaches beginners is also valuable. You learn slicer basics in Bambu Studio, material behavior (PLA vs PETG adhesion differences), design-for-printing constraints (overhangs, bridging, support placement), and iterative design workflows — all without fighting the machine itself. When you outgrow the 180mm build volume or need enclosed printing for ABS, the upgrade path is seamless: the A1 at $299 adds 76mm per axis and a quick-change nozzle, while the P1S at $699 adds full enclosure and 16-color AMS support. Your profiles, your slicer knowledge, and your Bambu Handy app workflow all transfer directly. No other manufacturer offers this smooth a ramp from $199 to $699 without changing a single software tool.
Common Gotchas
180x180x180mm build volume is genuinely small. Many popular prints on Thingiverse and Printables are designed for 220mm+ beds. Before buying, check that your intended prints fit within 180mm. For anything larger, the Bambu A1 (256mm bed) is the step up.
No enclosure means ABS/ASA printing is unreliable. The A1 Mini is designed for PLA, PETG, and TPU. If you need ABS for heat-resistant or structural parts, the P1S with its enclosed chamber is necessary. Attempting ABS on the A1 Mini results in warping and delamination.
The AMS Lite (4-spool, for A1 series) is NOT compatible with the full AMS (for P1S/X1C). If you upgrade from A1 Mini to P1S later, your AMS Lite doesn't transfer. Plan the upgrade path before buying accessories.
First-layer adhesion on the textured PEI plate requires the plate to be CLEAN. Fingerprints and residual oils cause adhesion failures. Wipe with IPA (isopropyl alcohol) before every print. This is the #1 "my prints won't stick" troubleshooting answer on r/BambuLab.
Full Specifications
Connectivity
| Specification | Value |
|---|---|
| WiFi | 802.11 b/g/n [1] |
I/O & Interfaces
| Specification | Value |
|---|---|
| Extruder | Direct drive [1] |
| Hotend | All-metal stainless steel, quick-change [1] |
| Auto Leveling | Eddy current + force sensor [1] |
| Build Plate | Textured PEI spring steel [1] |
| Camera | Built-in (remote monitoring) [1] |
| Display | 2.8" monochrome LCD [1] |
Physical
| Specification | Value |
|---|---|
| Enclosure | Open frame [1] |
| Multi-Color | AMS Lite compatible (up to 4 colors) [1] |
| Noise Level | 49 dB [1] |
| Dimensions | 347 x 315 x 365 mm [1] |
Who Should Buy This
At $199, the A1 Mini costs less than most Ender kits and prints better than printers at twice the price. Zero calibration, zero assembly, zero frustration. If you quit the hobby, you lost $199 instead of $700. If you love it, upgrade later.
This is the definitive plug-and-play printer. Auto-calibration handles everything. Bambu Studio slices models perfectly with zero manual tuning. Hit print, walk away, come back to a finished part. No bed leveling, no PID tuning, no firmware flashing.
Pre-assembled, 49dB quiet for dorm rooms, and the Bambu app makes sending prints as easy as printing a document. No technical knowledge required. Include a spool of PLA and they are printing within 15 minutes of opening the box.
The 180mm³ build volume cannot fit helmet sections or large armor panels. You would need to slice everything into tiny pieces with excessive seams. The A1 at $299 with 256mm³ or the K1 Max at $699 with 300mm³ are better choices for large-format work.
Better alternative: Bambu Lab A1
No enclosure means ABS warps and nylon absorbs moisture during printing. While the hotend reaches 300°C, the 80°C max bed temperature and open frame are the real limitations for engineering materials like polycarbonate and carbon-fiber nylon. The P1S with its enclosed chamber handles these properly.
Better alternative: Bambu Lab P1S
Ecosystem & Community
The A1 Mini shares Bambu Lab's full ecosystem — BambuStudio, Bambu Handy app, and cloud printing. Perfect for small functional prints, desk toys, and ESP32 project enclosures. The largest growing 3D printing community on Reddit.
Compatible Software
What to Build First
Print the iconic 3DBenchy calibration boat straight out of the box. No calibration, no tuning — just load PLA and hit print. The A1 Mini makes this moment magical for first-time 3D printer owners.
View tutorial →Must-Have Accessories
Video Reviews & Tutorials
Tutorials & Resources
- Bambu Lab WikiOfficial setup guides, maintenance schedules, and troubleshootingdocs
- Printables — Beginner-Friendly ModelsCurated collection of first prints that work perfectly on the A1 Minitutorial
- Bambu Lab A1 Mini ReviewIn-depth review covering speed, noise, print quality, and value propositionreview
Frequently Asked Questions
Is the A1 Mini too small for useful prints?
No. 180x180x180mm covers phone cases, Arduino enclosures, desk organizers, figurines, keycaps, and most functional parts. You hit limits on helmets, large vases, and armor panels. If 80% of your prints are under 150mm, the Mini is ideal.
A1 Mini vs Creality Ender 3 V3: which is better for a beginner?
The A1 Mini. It arrives pre-assembled with zero calibration needed, prints at 500mm/s out of the box, and costs $90 less. The Ender 3 V3 has a larger build volume (220x220x250mm) and Klipper firmware, but requires more setup and tuning. Choose the Ender only if you want to learn printer modification.
Can I print PETG on the A1 Mini?
Yes. The heated bed reaches 80°C and the hotend handles PETG temperatures (230-250°C) without issues. PETG adhesion on the textured PEI plate is excellent. Use Bambu Studio's PETG profile for optimal results.
Does the A1 Mini support the same AMS as the P1S?
No. The A1 Mini uses the AMS Lite, which holds 4 spools with no humidity control or RFID reading. The P1S uses the full AMS, which includes desiccant chambers and daisy-chains up to 16 colors. The AMS Lite is sufficient for most multi-color projects.
How long does the A1 Mini take to set up?
About 15 minutes from unboxing to first print. Remove shipping brackets, attach the spool holder, load filament, and connect to WiFi via the Bambu Handy app. The printer auto-calibrates on its first run. No bed leveling or firmware updates required.
Is the A1 Mini good for printing miniatures?
Good, not great. At 0.4mm nozzle it produces solid tabletop miniatures. For high-detail minis with fine features under 0.5mm, a resin printer delivers better results. The A1 Mini with a 0.2mm nozzle improves detail but cannot match resin for sub-millimeter features.
Should I buy the A1 Mini or save up for the A1?
Buy the Mini now if budget matters. The $100 difference buys you 76mm more build volume per axis and a quick-change nozzle on the A1. If you are unsure whether you will stick with 3D printing, the Mini at $199 is the lower-risk entry point.